Friday 25 October 2019

Happy Couple

Another layout for my memory album but this time using a more recent photo as the focal point and using a black and white photo of my parents wedding.
The background paper was amazing with colourful overlapping circles. The flowers were punched out of complimentary paper and shaped using a ball tool.

The title was cut from a scrabble paper so that everyone could choose their own titles to fit their layouts. 
That's about it for now but I'll be back with more soon xxx

Thursday 24 October 2019

Summer Break

Sometimes scrapbook papers lend themselves to cutting and decoupage and that's what happened here.
Four papers were needed to make this layout, the two shown as the background and another two for the flowers and the tape measures.
and I used a border punch to separate the photographs
Sticky foam pads helped with the 3d elements and finished it off nicely x

Wednesday 23 October 2019

When It Rains

I am a collector of some of the stamps from Lavinia Stamps. Admittedly I am not a big fairy/fantasy  fan but as you can see, there are more than enough background stamps  to collect. 
Another black and white stamping layout but again it is a great way for class to practise their stamping skills.
I added little stamped red hearts to the toadstools and tucked the photo behind a few of the cut out toadstools.
Ivy and of course the little tree houses
The wording was also stamped on paper, cut out and then added to the layout. 
Class photo
You can buy all of Lavinia Stamps HERE x

Tuesday 22 October 2019

Summer Photos

I am definitely short of seaside layouts and I especially love anything to do with the creatures under the sea so this was a no brainer. 
Two simple circles make a good focal point with just simple needle holes around the circumference which could be sewn with thread if wanted.
from the picture you can see I edged the circles with Distress Ink.
All of the seaside elements were coloured in using Distress Oxides.
Class photo
Loved making this. More tomorrow. x

Monday 21 October 2019

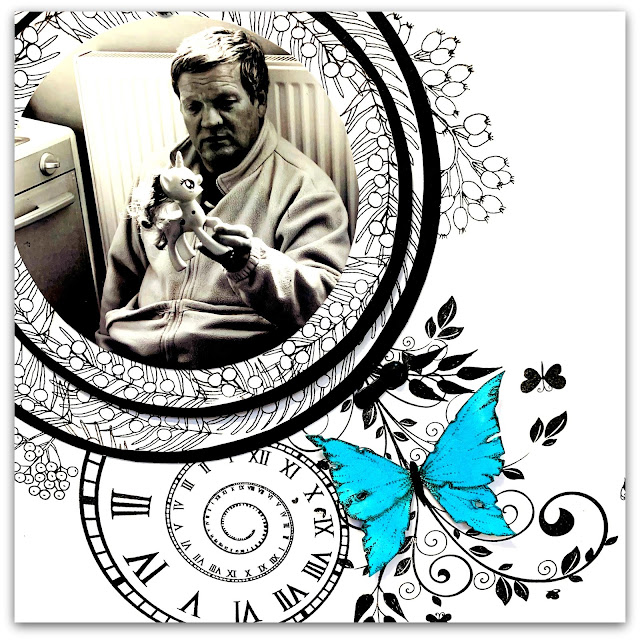
Somewhere in Time

Taught this class to my Tuesday night group in September and they loved it. The nice thing is I could use a mishmash of stamps that I already had in my stash.
 The beauty of this layout is that the circles move allowing more photos to be added to the inside, the number depending on the number of circles added.
The blue tattered butterflies are my go to and my favourite set of butterflies.


I printed all of the photos in black and white and used a turn and a brad to keep all of the circles in place. 
Class photo
xxx

Sunday 20 October 2019

Snowflake Christmas Card

So very simple and believe me the photo does not do this card justice. All made from die cuts and a lovely snowflake background paper and then blinged within an inch of its life.
A stunner and a real statement piece. I used Glamour Dust to give the sparkle and a gem in the centre to finish it off. (You can buy Glamour Dust HERE)
Class photo
 and believe it or not I took a video.
There is so much more to come. Have a great day xx

Saturday 19 October 2019

The Deer Family

I'm sure you are just like me and have loads of dies which are shut away in a cupboard and forgotten. These next two cards were made using two Sizzix strip dies, Woodland Deer and Gingerbread Men with Hearts (I think both are discontinued but you may be able to get them on EBay or Amazon)
Here is the first one. The clouds were made using the cloud stencil from HobbyArt.
The deer and trees were coloured in using proMarkers.
The second card I have used a scrapbook paper as the background and coloured the diecut using ProMarkers. 
I added little silver hearts hanging from the trees and drew the strings in using a thin black pen. 
Class photo
If you want to stencil and the two others that I use you can find them HERE xx

Friday 18 October 2019

Deer Couple

Another stamp I bought and then didn't use for a while but it is such an easy card to make and one that you can easily make time and time again. This time the stamp is from Woodware and its called "Deer & Doe"
The soft background is Tumbled Glass Distress Oxide and the Deer and Doe are coloured in using Gathered Twigs watered down and painted with a brush.
Class photo
I really enjoyed using this stamp and I have no doubt it will become a firm favourite. x

Thursday 17 October 2019

Patchwork Reindeer

I have had this stamp for a while but never used it. It was only when I started to colour him in that I realised how beautiful he is.
I think I enjoy using unusual stamps and I wonder why I never used it before. Coloured in using Pro-Markers and the background made using Salty Ocean Distress Oxide.
Here is one of the class photos
Loads more to come so keep checking back xx

Wednesday 16 October 2019

Merry Christmas Robin

I have made loads of Christmas cards this year and not all of them in card class. This wonderful Daisy B Robin was one I taught at the beginning of October and I love it. (you can find the stamp HERE)
The class was an introduction to Ecoline Brush Pens which is how I coloured in the Robin.

To give the card more dimension I stamped the Poinsettia a second time and added it to the card using silicone glue. The greeting is a peel off (yes I still use peel-offs at Christmas because they are pretty lol)
Here are a couple of pictures from class.

More tomorrow xx

Tuesday 15 October 2019

Good Together

When I first started Scrapping Your Family many years ago, I started making pages for a memory album. Over time I have included many pages that cover current family and events but I thought it was about time to use some older pictures especially as it was Margaret (one of our class mates) 50th Wedding Anniversary.

The pictures for this layout are of my maternal grandparents. I love the pictures in the little film strip.
I found that my old photo programme Picasa prints off contact photos which fit perfectly into the tiny holes.
The flowers are by Cottage Garden by HobbyArt and are one of their new releases (you can find them HERE)
All of the flowers are coloured with Distress Oxide Ink Pads and a paint brush.
and I used a die cut for the little branch. This was coloured in using promarkers and some people in class added a bird on the branch.

I have set the blog up to release a new post every day for the next 7 days so please keep checking back. xx